Moving from Wordpress to Hugo

For a very long time now I have had a blog powered by Wordpress. It has worked well all through that time and been easy to use - when I have actually written something. But it’s always required a server to host it, either a shared server years ago or a cheap (and small) dedicated virtual machine for a few dollars per month.
Servers not only cost more compared to other options, they need to be fed and cared for which takes up more time than just focusing on the content. While I’m defintely a technical person who likes some of the infrastructure stuff, I’m also a believer in us all having a limited amount of time to do the things of value. These days, managing a server is more important in order to keep it up to date for the many vulnerabilities and security patches coming at an increasing pace. Miss a critical security patch for the wrong bit of software and your server and the data in it might no longer be yours.
So, I had a look at some of the serverless alternatives to Wordpress. Some of these are static site generators (SSGs) based on content written in markdown language. It means you write your content on your local machine in fairly simple .md files. Those files then go through a quick process to turn them all into HTML with any associated JavaScript and images. Everything needed for your site is able to be previewed with a local temporary server and bundled up ready to be copied to your serverless solution of choice. Being basic files that only need serving up by a web server also means the site will be very fast for your users.
Serverless is something that’s been around for a few years now and came from cloud providers like Amazon Web Services (AWS). They saw an opportunity to simplify things for their customers for the same reasons as above, people want the value of the code, not the cost and effort of server management. When you realise that the PHP (or any other server side JIT compilation) processes simply builds HTML for basic sites, it becomes obvious you can compile it and use cheap and reliable web object storage like AWS S3 to run your site. No servers, no patching, no downtime, faster and almost no cost.
For those people familiar with code management and version control (e.g. Git, SVN, etc) it also means you can manage your site with those same tools. The same content review (pull request approvals) and automated deployment options (GitHub, Bitbucket, etc) can obviously then be used. In fact services like GitHub offer simple hosting options for your site you can use to publish to after committing your code.
Jekyll
The first static site generator I looked at was Jekyll. If you Google for those sort of terms, Jekyll is likely going to appear as one of the top results. It’s been available for a long time and is used by lots of people and companies.
Jekyll is a Ruby based app that has plenty of themes and extensions available. I installed it onto my Ubuntu laptop and followed some simple instructions to have the default site running in a few minutes. Editing the config files, creating a new page, adding images was all pretty easy.
When it came to editing the theme for some customisations I found it a bit more difficult to find useful information, but most changes can be discovered by looking through the example sites of the themes. The themes are also split across a couple of install options, some of which need the install of Ruby Gems. I have no experience with Ruby and found the experience a little frustrating, so went looking for alternatives.
Hugo
Hugo was the next option I found looking through site generator options. It’s a Go executable that’s a simple install and works in a very similar way to Jekyll. I copied the markdown files I’d created in Jekyll, into the right folder in the Hugo structure and found a suitable theme. At this stage I sort of had my head around how these site generators work and the folder and content layout started to make sense.
snap install hugoAfter the Hugo app is installed, you can create a new site. We’ll call it your-site in the examples, so replace that with whatever name you want.
hugo new site your-siteAs per the screenshot below from Visual Studio Code, running hugo new blog/your-page-name.md will create a markdown file with that name in the content folder. It’ll have some basic attributes in a default header section and below that you add whatever content you want using markdown.
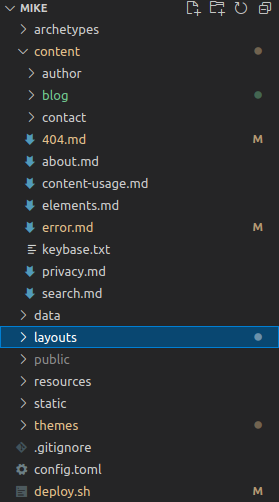
Any image files (as well as things like custom fonts, albeit in their own folder) go into the static/images folder and you can link to those using a path like /images/hugo-site-layout.png in your markdown.
To see what your site and content will look like, you can run hugo server -D from a command prompt. This creates a temporary web server using port 1313 that you can use in your web browser as http://localhost:1313. Each time you edit your content or change static content, that server will automatically refresh and show the updates. Very useful for multiple screens. The use of the -D flag means it’ll render any content set as a draft version with draft: true in the header attributes.
Themes go into the themes folder of course, but are referenced in the config.toml file. As the name suggests it’s this file that holds the important information on your site name, theme selection and a heap of other potential values. Depending on the theme you’re using, there may be many other options that need setting in the config. The best way to know what there is to configure is to have a look at the theme’s example site at themes/your-theme/exampleSite. Copy as much as is needed from the example file into your top level config.toml file and configure as required.
Hugo (like its alternatives) offers some built-in options for more advanced things like comments and usage analytics. The theme usually supports it with options like googleAnalytics = true in the site config, but may not have the template “partials” configured.
Something not so obvious when enabling options like Disqus comments, Google Analytics and Twitter cards is that Hugo has internal templates. These references to the templates may need to be added to your theme’s template files to get the additional content to show. Rather than editing the theme’s source code for the templates, copy the file that needs changng to the same sub-path in layouts in the root of your project, then make changes to that. i.e. copy from themes/your-theme/layouts/your-template.html to layouts/your-template.html
An example of referencing the internal templates in a theme layout files.
<meta charset="utf-8" />
<title></title>
<meta name="author" content="{{ site.Params.author }}" />
<meta name="description" content="{{ with .Params.description }} {{.}} {{else}} {{ with site.Params.description }} {{.}} {{end}} {{end}}" />
<link rel="icon" href="{{ site.Params.favicon | absURL }}" type="image/x-icon" />
{{ template "_internal/google_analytics.html" . }}<br>{{ template "_internal/twitter_cards.html" . }}
Once you have some content and config done and looking good on the local server, you’re ready to publish. To process your site, pages, Hugo extensions and the rest all you need to do is run hugo in your project folder. That will bundle everything up into the static pages and put it in the public folder. If you’re using git for code management, you should have that folder in your .gitignore folder to not manage it.
You can convert your previous TXT or HTML content in various ways. There are Wordpress plugins you can install into your old site or you can use online services like CloudConvert to get the markdown needed.
AWS
OK, you now have some sort of site and content pages ready to publish somewhere for the rest of the world to view your awesomeness. As per the earlier comments, I’ve chosen AWS and their S3 and CloudFront services to do this. You can get similar outcomes with Azure or GitHub as well as other providers. I’d be surprised if any of these cost more than a couple of dollars per month, even for very popular sites.
Your site might also have its own domain name. i.e. some hostname not provided by AWS or another service. This adds some slight complexity but not much.
I’ll detail more on the AWS specific configuration in another post, but will describe what services to use and why in the sections below.
S3
The AWS S3 service is one of the oldest in the Amazon Web Services portfolio. Its job is to store files reliabily and service requests for these files quickly. It also has an option for acting as a web server which is just what we’re looking for.
But while S3 offers cheap reliable storage, it doesn’t provide the following,
- we can’t use our custom domain name www.example.com. S3 web hosting does provide its own URL in the form of http://your.bucket.name.s3-website-ap-southeast-2.amazonaws.com/ but that’s not very useful for your visitors or SEO.
- there is no default option for HTTPS.
Getting your static site into S3 has a few different options. All of them need to do the same required actions - check for issues, build and then copy into S3. If you use CloudFront, it also needs to invalidate the cached copy of the site so the changes get fetched by the next user.
Deploy with hugo
Deploying what you have in your content folder and getting it into S3 can be done using the following - once it’s defined in your config file.
hugo deploy --target yourDeploymentNameThe hugo deploy process has docs in the official Hugo documentation and is fairly straight forward even if it does still need the AWS cli installed.
Deploy via local script
For the more complicated version and if you have any staging actions needed, you can run the commands below or use this script from your Hugo project folder. For this to work you’ll need to have the aws cli app installed and configured so it’s able to access and make changes to your AWS account.
#!/bin/bash
cd /home/your-home-dir/projects/your-site
hugo --cleanDestinationDir
hugo
aws s3 sync /home/your-home-dir/projects/your-site/public s3://www.your-site.com/ --delete
Deploy with GitHub Actions
You can choose to trigger “actions” with GitHub on each commit to a specific branch in your repo. There’s an Action created at https://github.com/plopcas/hugo-s3-action which shows how to do this.
I recommend forking these Actions to your own repo and having a look at the code first to ensure that it’s unlikely to be doing anything nefarious. Once configured, each commit will trigger a build in a GitHub container, then copy the static output to the S3 bucket and invalidate the CF distribution.
Note that each build might take a minute or so to complete and this will be counted against a limited time for your GitHub allowance for the month. If you do get billed by GitHub, then excessive use (like multiple builds per hour), might actually cost some money.
Deploy with other services
You can also use a service like CloudCannon, Cloudflare or Netlify to host your static files on their web servers. Once they see a commit in the right branch in GitHub, they can run the Hugo build process and start using the output.
CloudFront
AWS CloudFront acts as a front end to the HTTP requests and we’ll use it in front of the S3 bucket web hosting. CloudFront does have HTTPS as an option and can use AWS provided certificates and can use custom domain names. That’s most of our problems solved!
CloudFront also has behaviours for caching and acts as a Content Delivery Network (CDN) with global public endpoints. Which means that anyone in the world probably has a CloudFront endpoint fairly near to them, so their browser requests don’t need to traverse the globe to get to your old web server (or S3 bucket in this case). CloudFront will use the same custom hostname with your domain name in all locations and cache content to keep responses really fast and minimise those requests to the S3 bucket.
Certificate Manager
If we have our own custom domain and want to use HTTPS (why wouldn’t we?) then it’s simple to request a new (and free) certificate via AWS Certificate Manager. Requesting a cert takes a few minutes and once it’s verified you own the hostname (via a DNS check), the new certificate is available to select in the CloudFront config.
You can manually load your own certificates to AWS Certificate Manager if needed. But the good thing about ACM is that it’ll automatically renew your certificate as needed.
Route53 (or your own DNS)
There are a couple of things you need to create DNS records for to make everything work. This obviously requires you to own your own domain and have your domain registrar pointing to a DNS service that you can control to add and remove records.
- a CNAME record for the AWS Certificate Manager service to verify you own the domain. The info for this is provided when you request the certificate and this record should remain for any certificate renewals.
- a CNAME for the website name (matching the certificate name) that points to the CloudFront distribution domain name. The CloudFront name is provided when you complete the deployment and is something like
abcd1234.cloudfront.net